
Table of Contents
How to Use Retevis L2 POC Radio's OTA Programming, Account Management, and Dispatch Platform
- Posted by:Retevis
- 3 Comments
The Retevis L2 POC (Push-to-Talk Over Cellular) radio is a powerful communication tool designed for industries like logistics, retail, warehouse, and security. With its advanced features, the L2 offers over-the-air (OTA) programming, an intuitive account management platform, and a comprehensive dispatch system. These functionalities ensure seamless, real-time communication across multiple locations. In this guide, we will walk you through the steps for OTA programming, managing accounts, and using the dispatch platform to optimize your communication network.
OTA Programming for Retevis L2: Simple and Efficient
OTA (Over-the-Air) programming allows users to update or configure radios remotely, eliminating the need for physical connections. Here's how to program your Retevis L2 device using OTA.
Before performing OTA programming, you first need to download L2 programming software on your computer.
On the L2 product page, click RelevantDocuments to find the programming software, which you can then download.
Steps for OTA Programming:
1. Power On the Retevis L2:
Turn on the L2 device and enter the POC Program screen. Keep the interface open while you proceed to the next steps.
Note: The MEID and Account ID will be displayed after entering OTA programming twice.
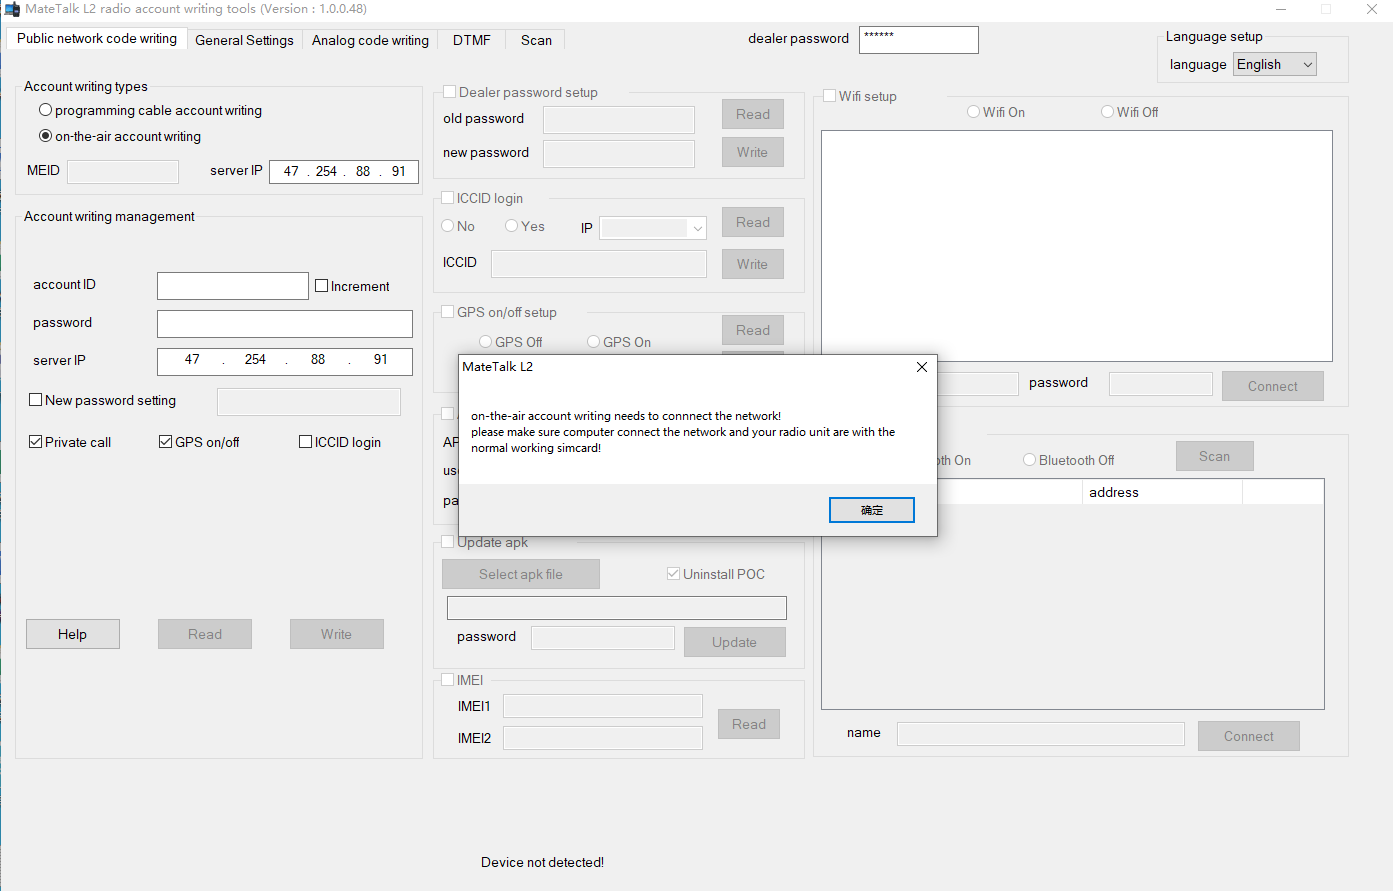
2. Open the Programming Software:
Launch the Retevis programming software and go to the Public Network Code Writing screen.
Select On the Air Account Writing (Position 1 in the interface).
3. Enter Device Details:
Input the MEID and IP Address from the L2 device. If you need to change the IP address, click Change IP (Position 2).
Note: If you need to change IP, the password is 123456.
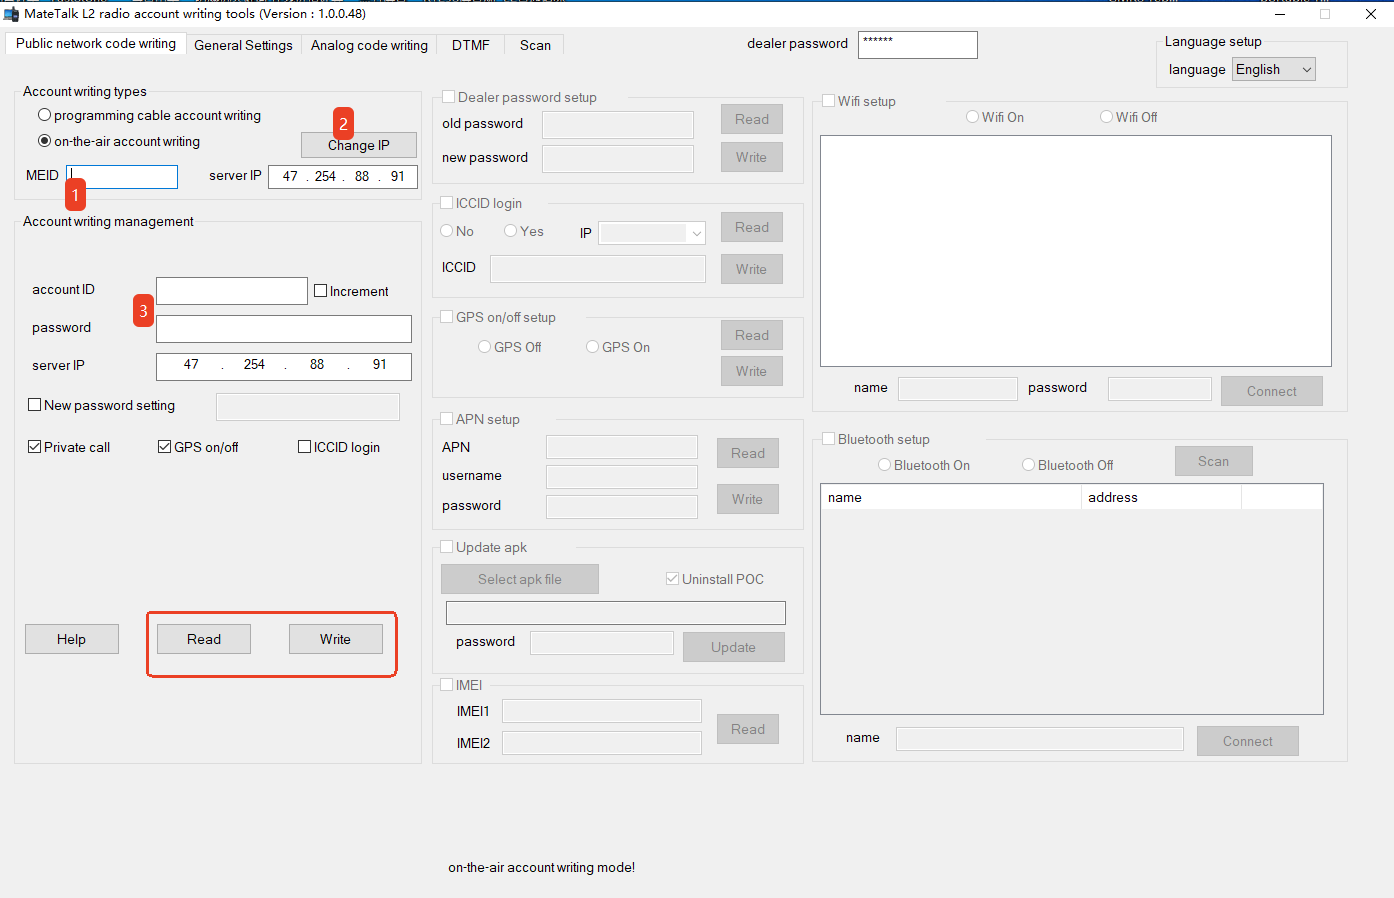
4. Enter Account Credentials:
Input the Account ID and Password for the device. These are essential for secure communication.
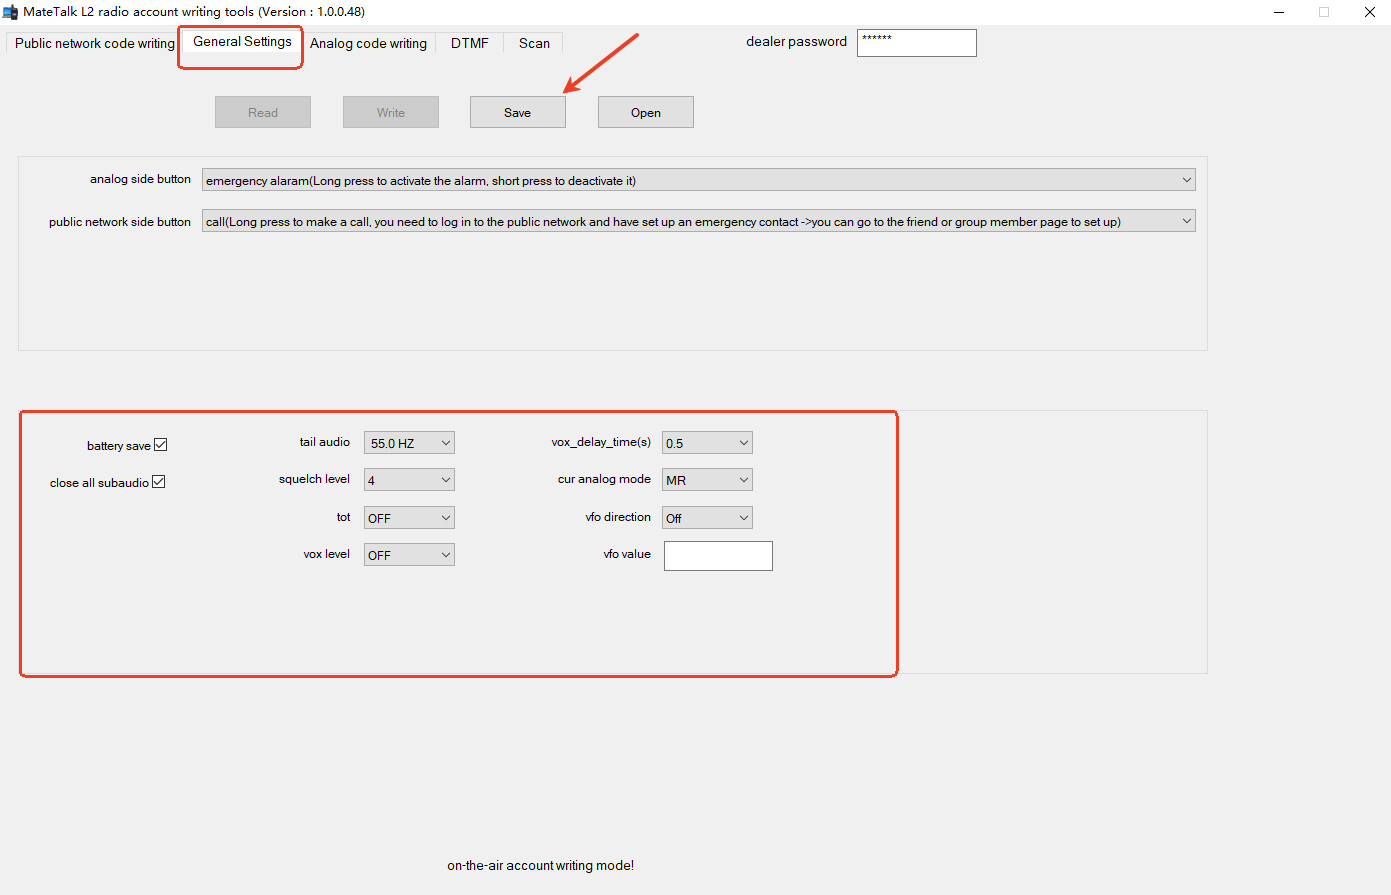
5. Configure Additional Settings:
Set other relevant options as needed and Save. Once ready, click Write to complete the OTA programming process.
Account Management Platform: Add Accounts and Create Groups
Managing user accounts and creating communication groups is essential for efficient network management. Follow these simple steps to add accounts and groups on the Retevis L2.
Note:
1. The website address of the account management platform: US and EU
2. If this is your first time purchasing a Retevis L2 and you do not have an account and password for the account management platform, you will need to contact Retevis to activate your account.
Steps for Adding an Account and Creating Groups:
1. Log in to the Account Management Platform:
Access the platform with your L2 device credentials to begin managing accounts.
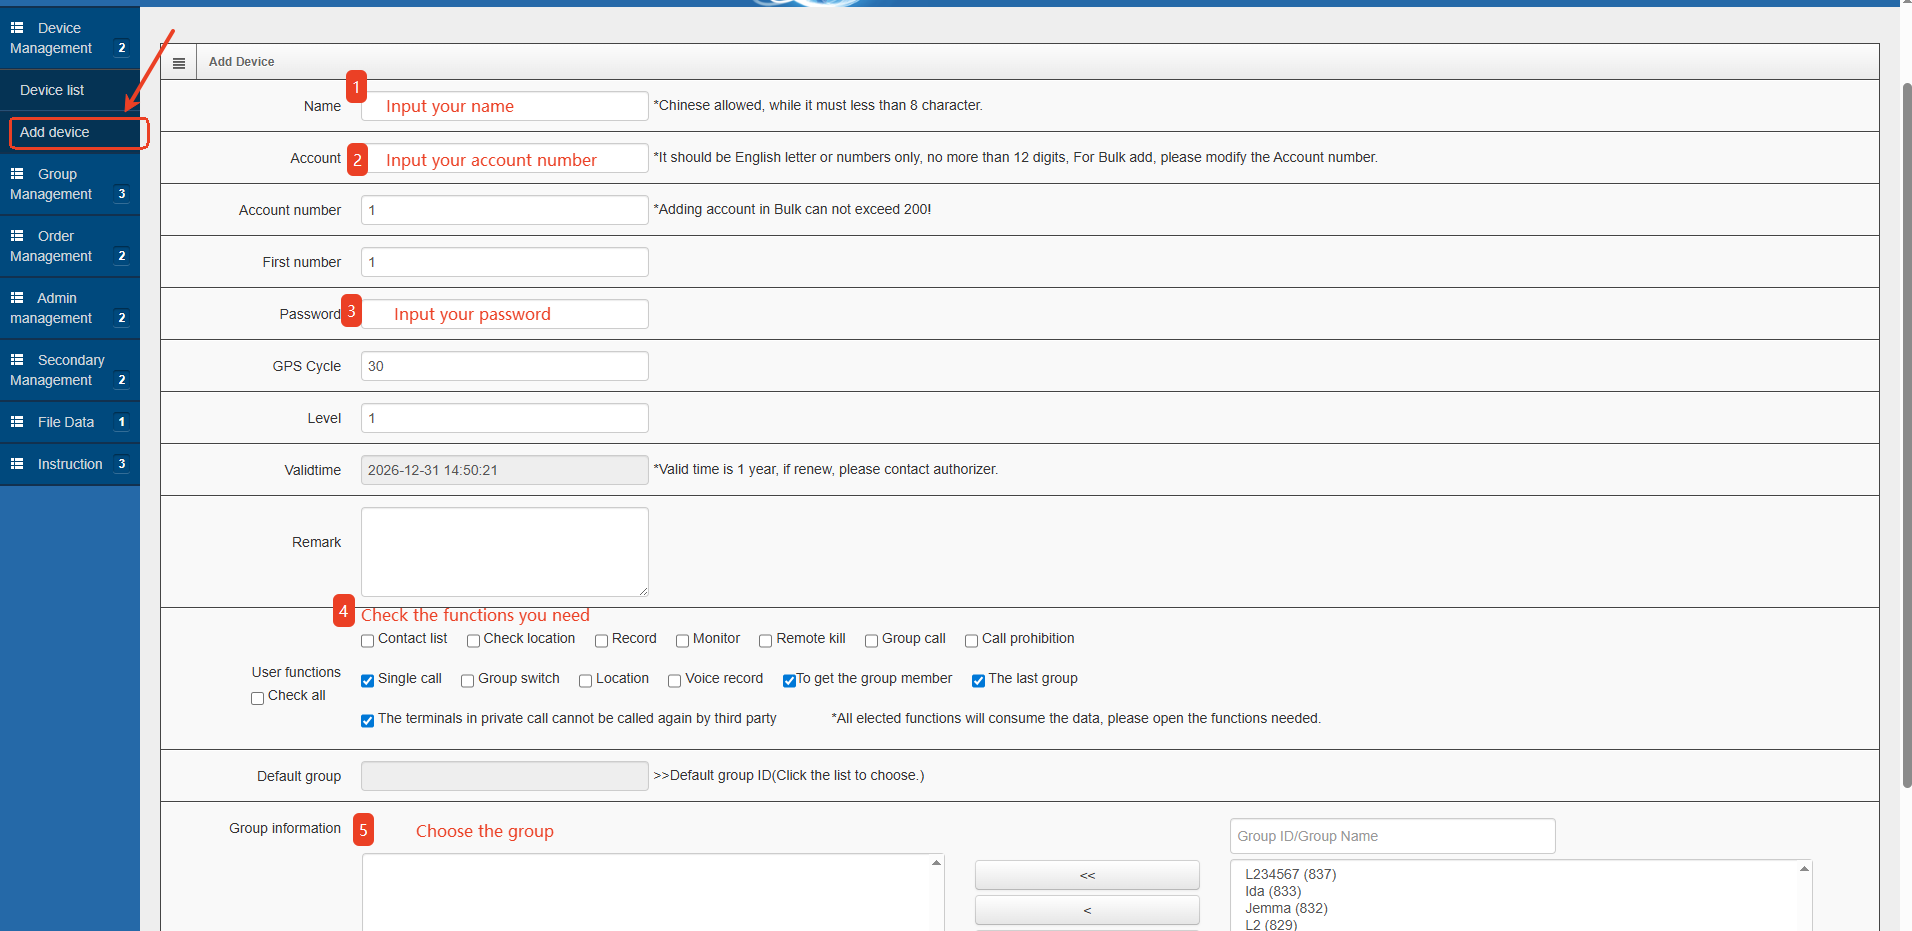
2. Add a New Device:
Navigate to the Device Management section and select Add Device. You will be prompted to enter the Account ID of the L2 device.
Note:
The account used in this position must match the Account ID of your L2 device. If you have forgotten your account, you can access the programming software, select OTA Programming, and enter the MEID to Read the account ID.
3. View Device Status:
Upon successful synchronization, the L2 device will restart and the new device will appear as Online in the device list.
Create Communication Groups:
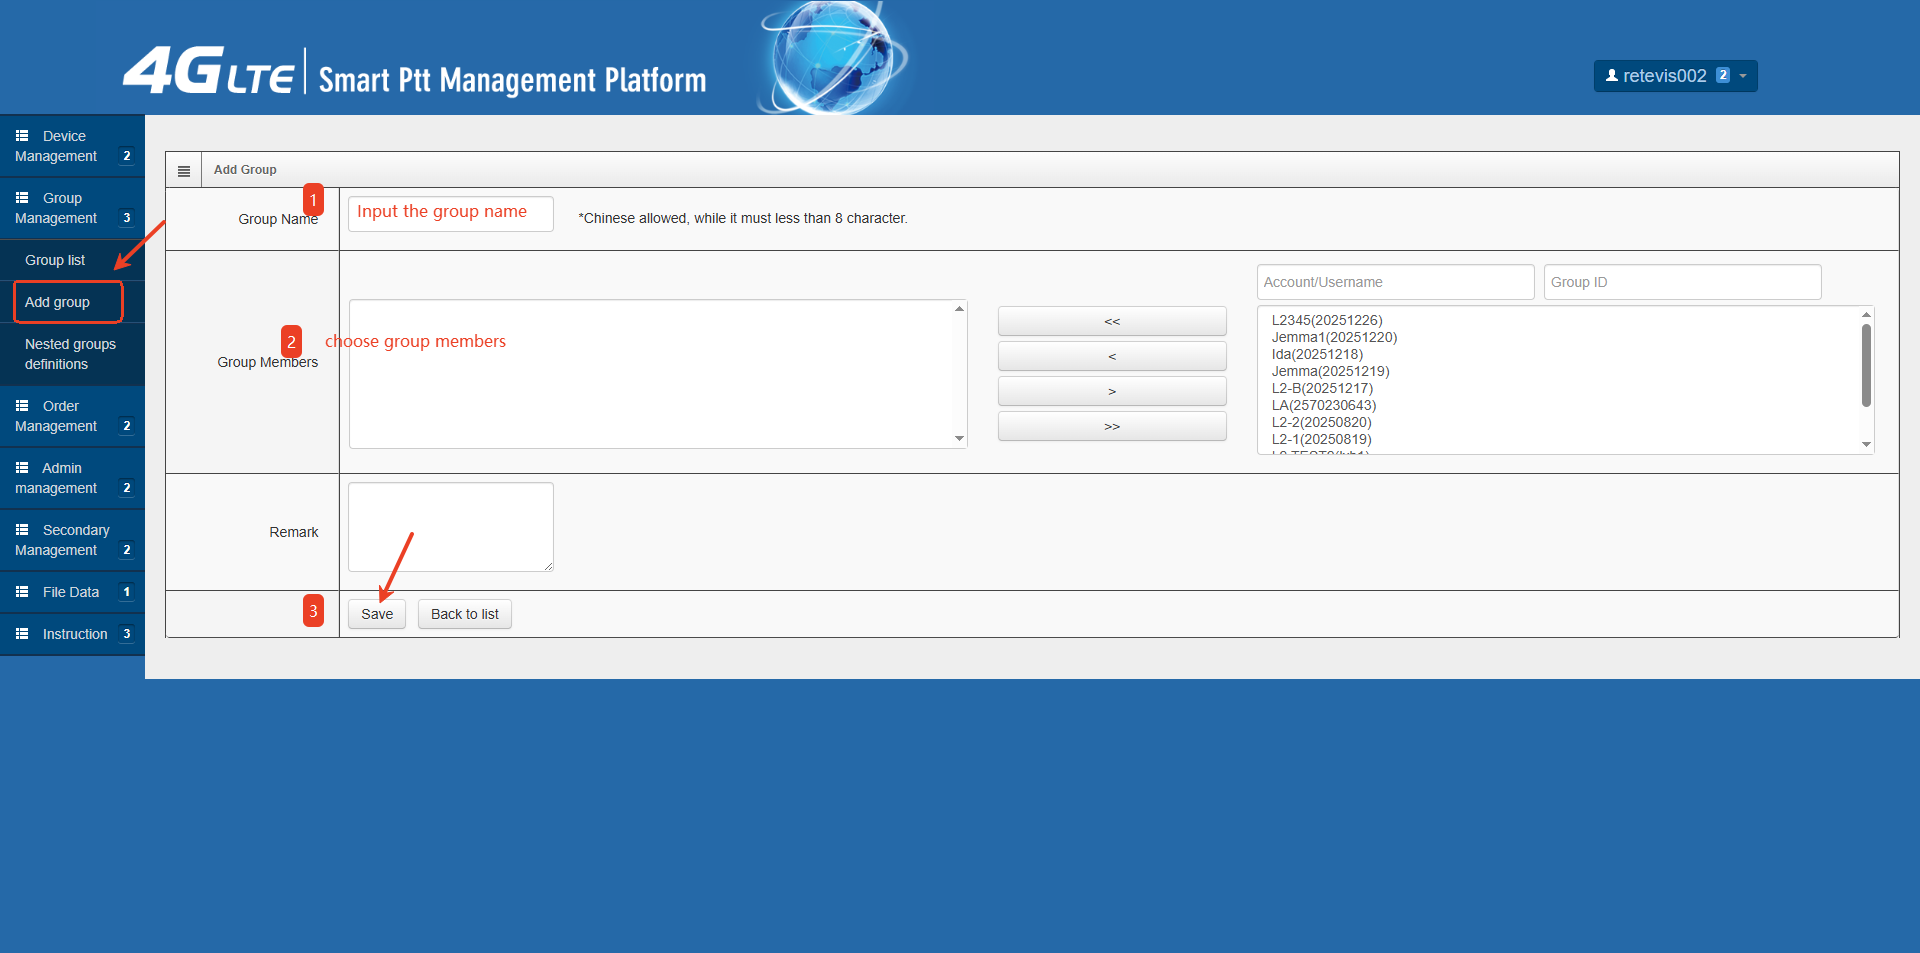
4. Create a Group:
To create a group, go to the Group Management section and follow the example in the provided images. Here you can add new groups for team communication.
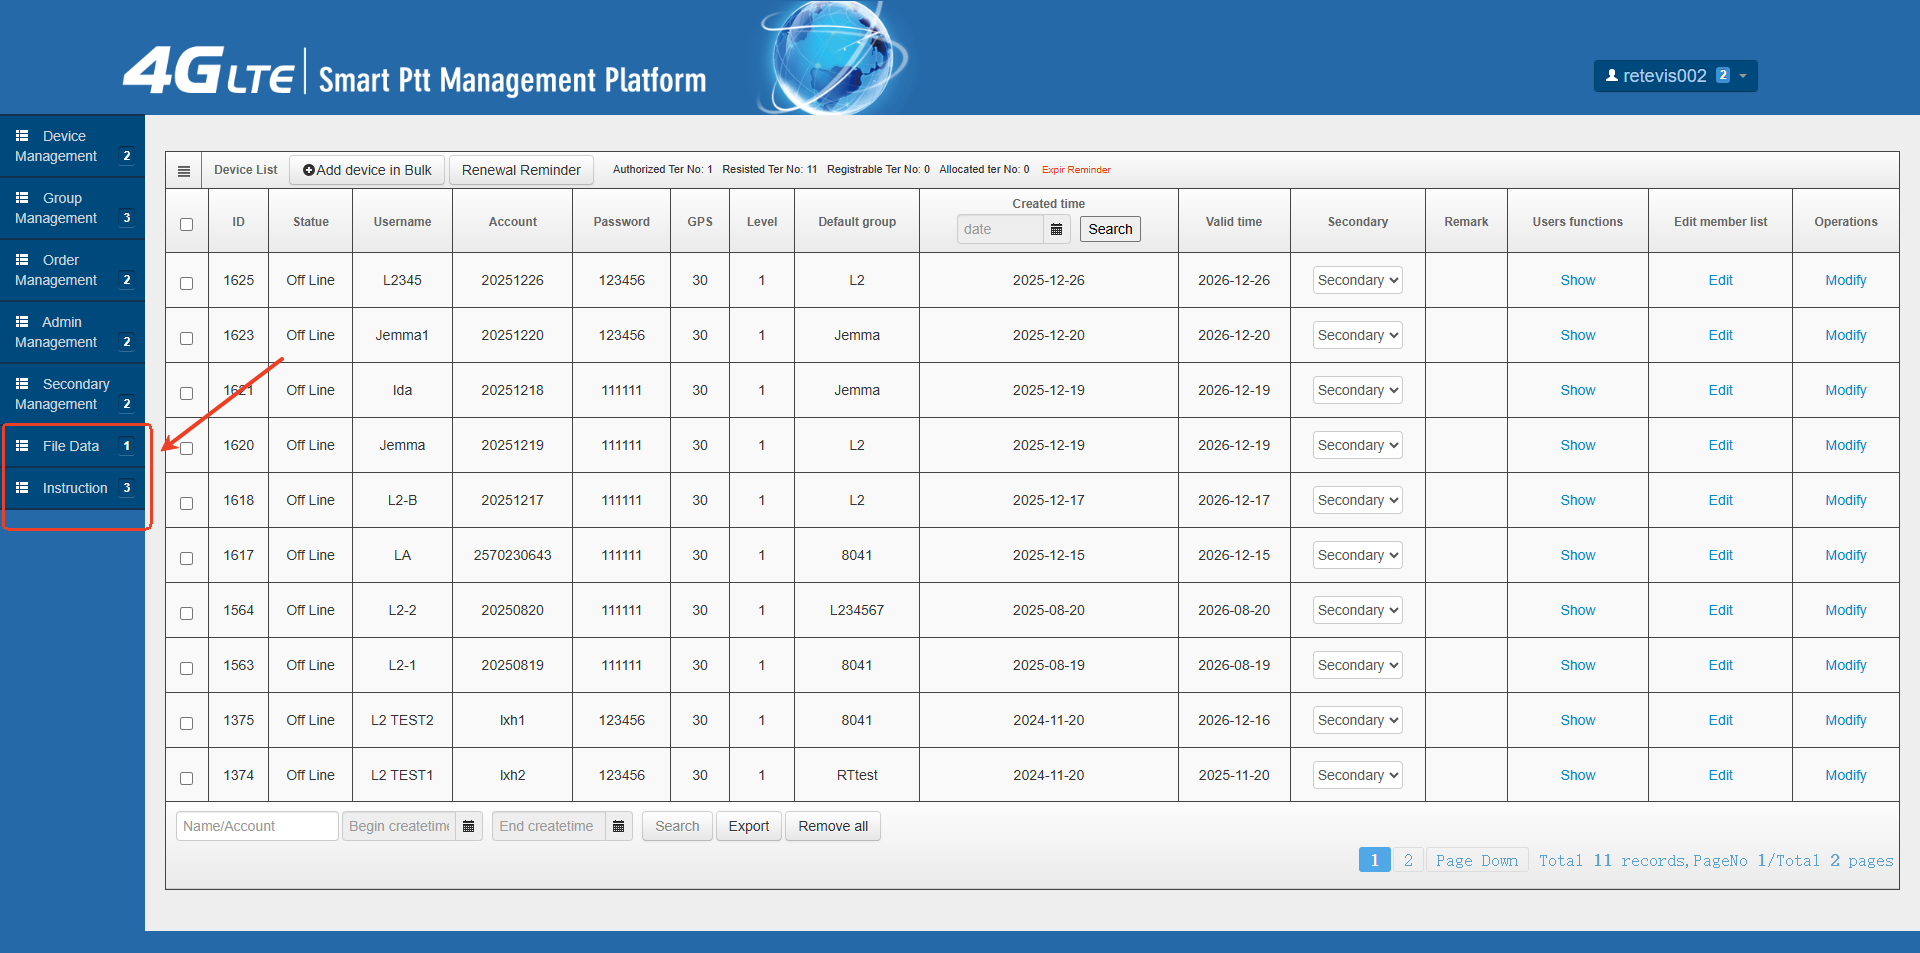
 5. More Instructions
If you need more instructions, you can click on "File Data" and "Instruction" on the left.
Dispatch Platform: Streamline Communication with GPS and Group Calls
The Retevis L2 dispatch platform enhances communication with real-time location tracking and group calling features. It's perfect for industries like retail and logistics, where constant coordination is required.
Steps for Using the Dispatch Platform:
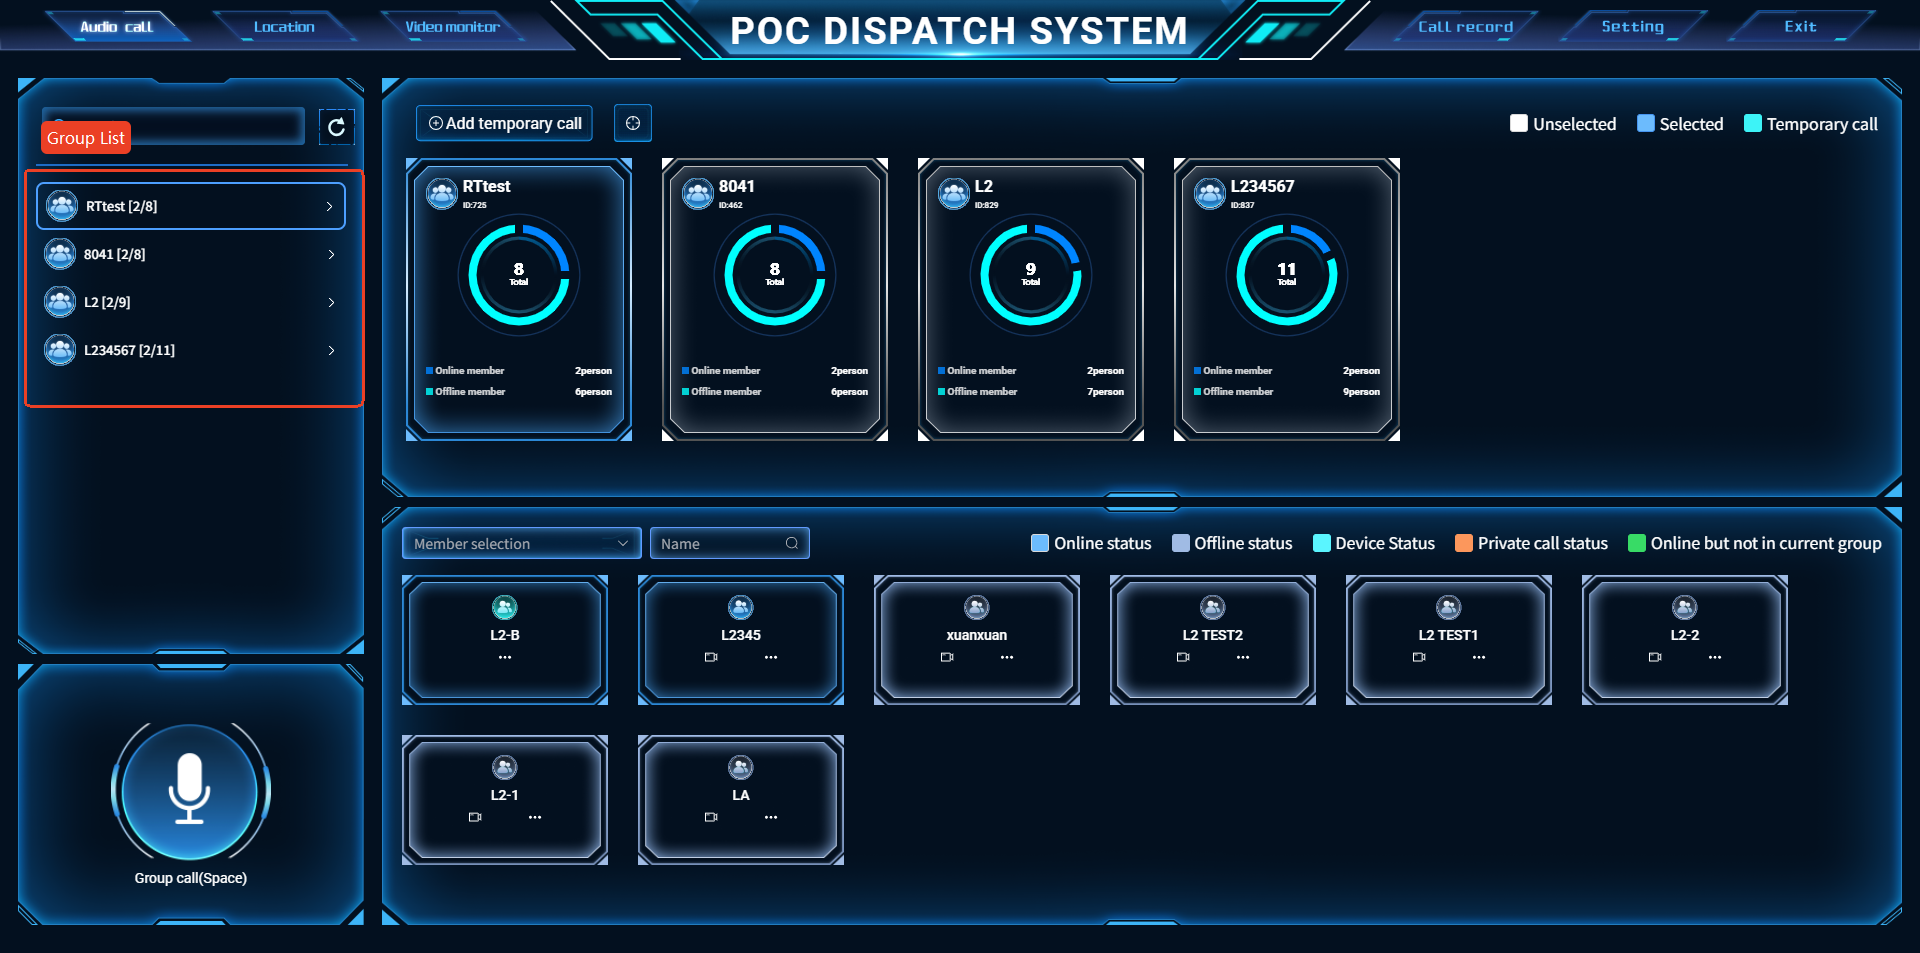
1. Log in to the Dispatch Platform:
Use your L2 device’s account credentials to log in. Before logging in, ensure the device’s GPS is enabled, and the device is turned off.
2. Select Groups and Members:
The left-hand menu will display your group list. From here, you can select a group or individual members for communication. Make sure the selected devices are online to initiate communication.
3. Track Member Locations:
The platform offers two display modes for GPS tracking. You can choose according to your needs.
4. Member Location View
You can track members in real time and initiate calls based on location proximity.
5. Use GEO Fence for Location-Based Calling:
GEO Fence allows you to define a virtual boundary. Members within the defined area can communicate freely, while devices outside this zone will trigger an alert. This feature is particularly useful for ensuring that team members stay within designated work zones.
Real-World Applications: Retail and Logistics Industry
The Retevis L2 POC radio, with its robust OTA programming, account management platform, and dispatch capabilities, is perfect for industries like retail and logistics.
Retail Industry Example:
In a retail environment, managers can use the L2’s group calling feature to coordinate with store teams in real-time, ensuring smooth operations during peak hours. With GEO Fence capabilities, managers can also ensure that store associates remain within their designated areas, improving security and operational efficiency.
Logistics Industry Example:
In logistics, real-time communication between drivers, warehouse teams, and logistics managers is crucial. The L2’s GPS tracking and dispatch platform help monitor delivery routes and optimize delivery schedules. Additionally, the ability to create specific workgroups ensures that each team has its own channel for streamlined communication, while OTA programming makes it easy to update devices remotely, even across multiple locations.
Conclusion
Retevis L2’s over-the-air programming, account management, and dispatch platform provide all the tools needed for seamless, efficient communication in industries such as retail, logistics, and security. By using the L2’s advanced features, businesses can stay connected, improve team coordination, and streamline operations across multiple locations.


")
")
")
")


 Two-Way Radio Guide: Why PTT Matters?")


Comments (3)