
Table of Contents
How to Use the Retevis E2 Digital Intrinsically Safe Radio: A Step-by-Step Guide
- Posted by:Lucky
Working in places like chemical plants or dusty factories means safety can’t be compromised. That’s where the Retevis E2 shines—it’s built to be digital intrinsically safe, meaning it won’t spark and cause explosions, but still gives you solid, clear, and reliable communication.
If you just got your Retevis E2, this guide will help you from unboxing to basic use—simple and easy.
1. What’s in the Box? First Make Sure You’ve Got Everything
When you open up your package, check that you have all these parts (this is the standard package):
• The radio itself (the main unit)
• Battery
• Antenna
• Charging base
• Charging cable
• Lanyard
• Belt clip
• Programming cable
• User manual
It might sound obvious, but it’s worth double-checking before you start setting it up.
2. Installing the Retevis E2 Handheld Radio Accessories
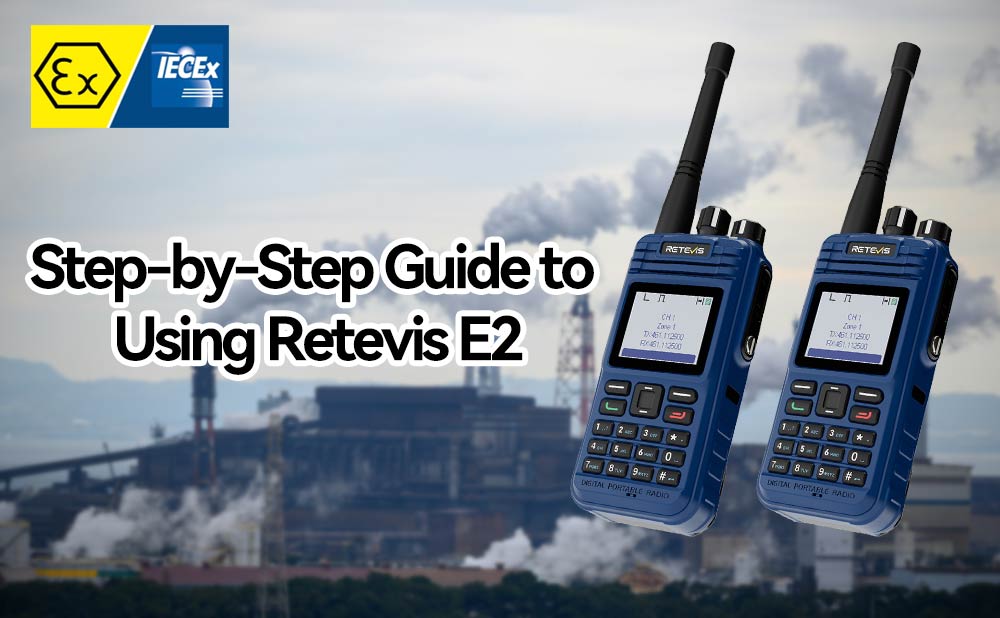
2.1 Installing or Removing the Antenna
Grab the base of the antenna and screw it clockwise onto the top connector of the radio until it’s fasten. To take it off, just turn it counterclockwise.
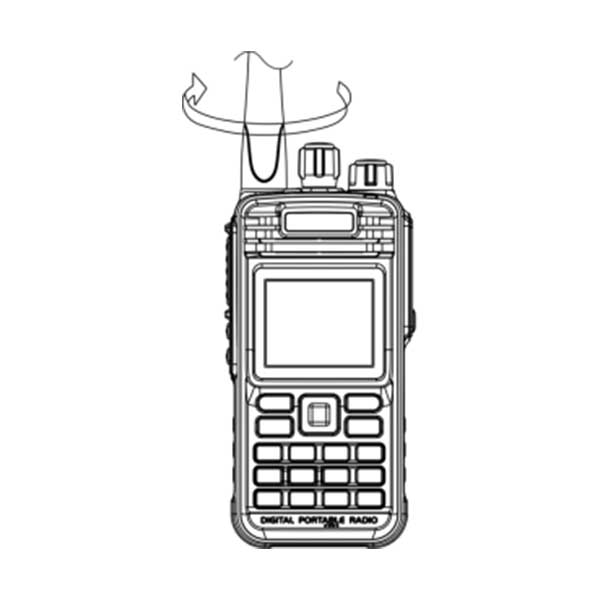
2.2 Installing or Removing the Belt Clip
Use the two screws (3×4mm) that came with your radio to attach the belt clip firmly to the back.
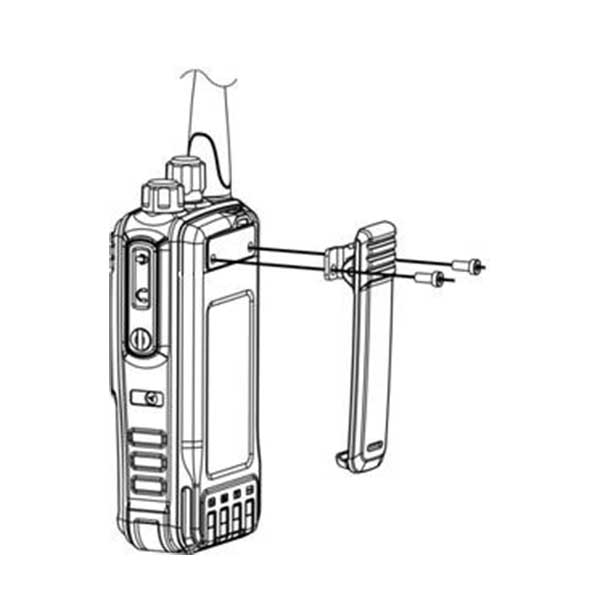
2.3 Attaching or Removing the Hand Strap
Thread the hand strap through the loop on the back of the radio and secure it.
3. Installing and Removing the Battery
To install, line up the battery with the back of the radio and push it until it clicks in place.
To remove, press the latch and slide the battery upward.
4. Charging and Battery Maintenance Tips
4.1 First Charge When You Use the Retevis E2 Intrinsically Safe Radio
Your new battery isn’t fully charged when it ships. Charge it for at least 5 hours before using. It takes about three full charge-discharge cycles to get the best battery life.
4.2 How to Charge the Retevis E2 Explosion-proof Radio
1. Plug the charger into a wall outlet.
2. Place the battery or the whole radio (with battery inside) into the charging base.
3. The charger’s light will glow red while charging and turn green once done.
4. If the charger flashes red and green, the battery might be damaged, too hot, or not connected right.
4.3 Retevis E2 Battery Maintenance Tips
• Charge in temperatures between 5℃ and 40℃ for safety and best results.
• Turn off the radio before charging.
• Don’t unplug or remove the battery while charging.
• Keep battery contacts clean and dry.
• Battery life drops in cold weather (below 0℃), so keep a spare battery handy.
• If you store your battery long-term, fully charge it first and recharge every 3 months for Ni-MH or every 6 months for Li-ion batteries.
5. Connecting the Programming Cable
1. Open the accessory port cover on the side of the radio.
2. Plug in the programming cable and tighten the screw to secure it.
3. Connect the other end to your computer.
4. Use Retevis programming software to set frequencies and other settings.
6. Basic Operation After Unboxing the Retevis E2 Intrinsically Safe Radio
Step 1: Power On and Off
Turn the power/volume knob clockwise until you hear a click to power on. Turn it back counterclockwise to power off.
Step 2: Adjust Volume
Rotate the same knob clockwise to make it louder and counterclockwise to lower the volume.
Step 3: Select a Channel
Turn the channel knob on top to pick your channel. Make sure all radios you want to talk to are on the same channel.
Step 4: Talk and Listen
Press and hold the Push-To-Talk (PTT) button on the side to speak. Let's go to listen.
Step 5: Set Privacy Codes (CTCSS/DCS)
Use the programming software to set these codes if you want privacy or to avoid interference.
Step 6: Switch Transmit Power
You can pick high or low power modes through programming software—high for long range, low to save battery.
Step 7: Enable VOX Hands-Free Mode
VOX lets you talk without pressing PTT. It works with compatible headsets. Set it up and adjust sensitivity with programming software.
Step 8: Safe Use and Storage Suggestions
• Never open the radio—its safety comes from a sealed design.
• Always use Retevis-approved batteries and chargers.
• Store in a cool, dry place and charge regularly.
Follow these steps, and your Retevis E2 will keep you connected safely and clearly in any hazardous environments and chemical plants. Need more help? Check the full manual or contact Retevis support.


")
")
")
")


 Two-Way Radio Guide: Why PTT Matters?")


Comments
No data Yet